Showing posts with label create. Show all posts

Friday, November 2, 2012

Christmas Cards!!!

I finally got back into crafting! It felt really good to just sit down last weekend and PLAY! Of course, with Christmas only 2 months away, I chose Christmas cards! I know eventually I will need to sit down and whack off a stack or two if I want to have enough to send out, but not this time! This weekend was all about exploring and having fun and being creative! I especially loved our mother/daughter craft time, but unfortunately I can't show you Mandy's as I don't know where she put them! LOL     It's hard to tell on these cards, but there is actually lots of bling and glitz. The snowflakes all have smooch spritz on them. The truck is coloured with a metallic green gel pen. The ornaments are outlined in Dazzling Details.
Definitely one of the best parts of Christmas crafts - lots of glitter and shine!


Tuesday, September 4, 2012

Face Paint Fun

Amanda asked for face paint at her birthday party. My mum and sister very kindly picked some up, but then I forgot to use it.

Yesterday Amanda and Nicolas came to me asking for some, and I managed to oblige them. I am not artistic, so I am impressed with how well it turned out. I am sure the true artists are cringing but we had fun! LOL


Tuesday, June 12, 2012

Menu Board

Hi Folks!

After a long dry spell I finally had a crafty weekend, or should I say week? I had a friend over for a few days and it was fun to spend some time crafting with her.

The highlight of my weekend was making a menu board for my kitchen. Menu planning is something I have always struggled with, and I have loved some of the menu boards I have seen on friends' blogs and on Pinterest. This weekend I finally had the joy of making my own! Yay!


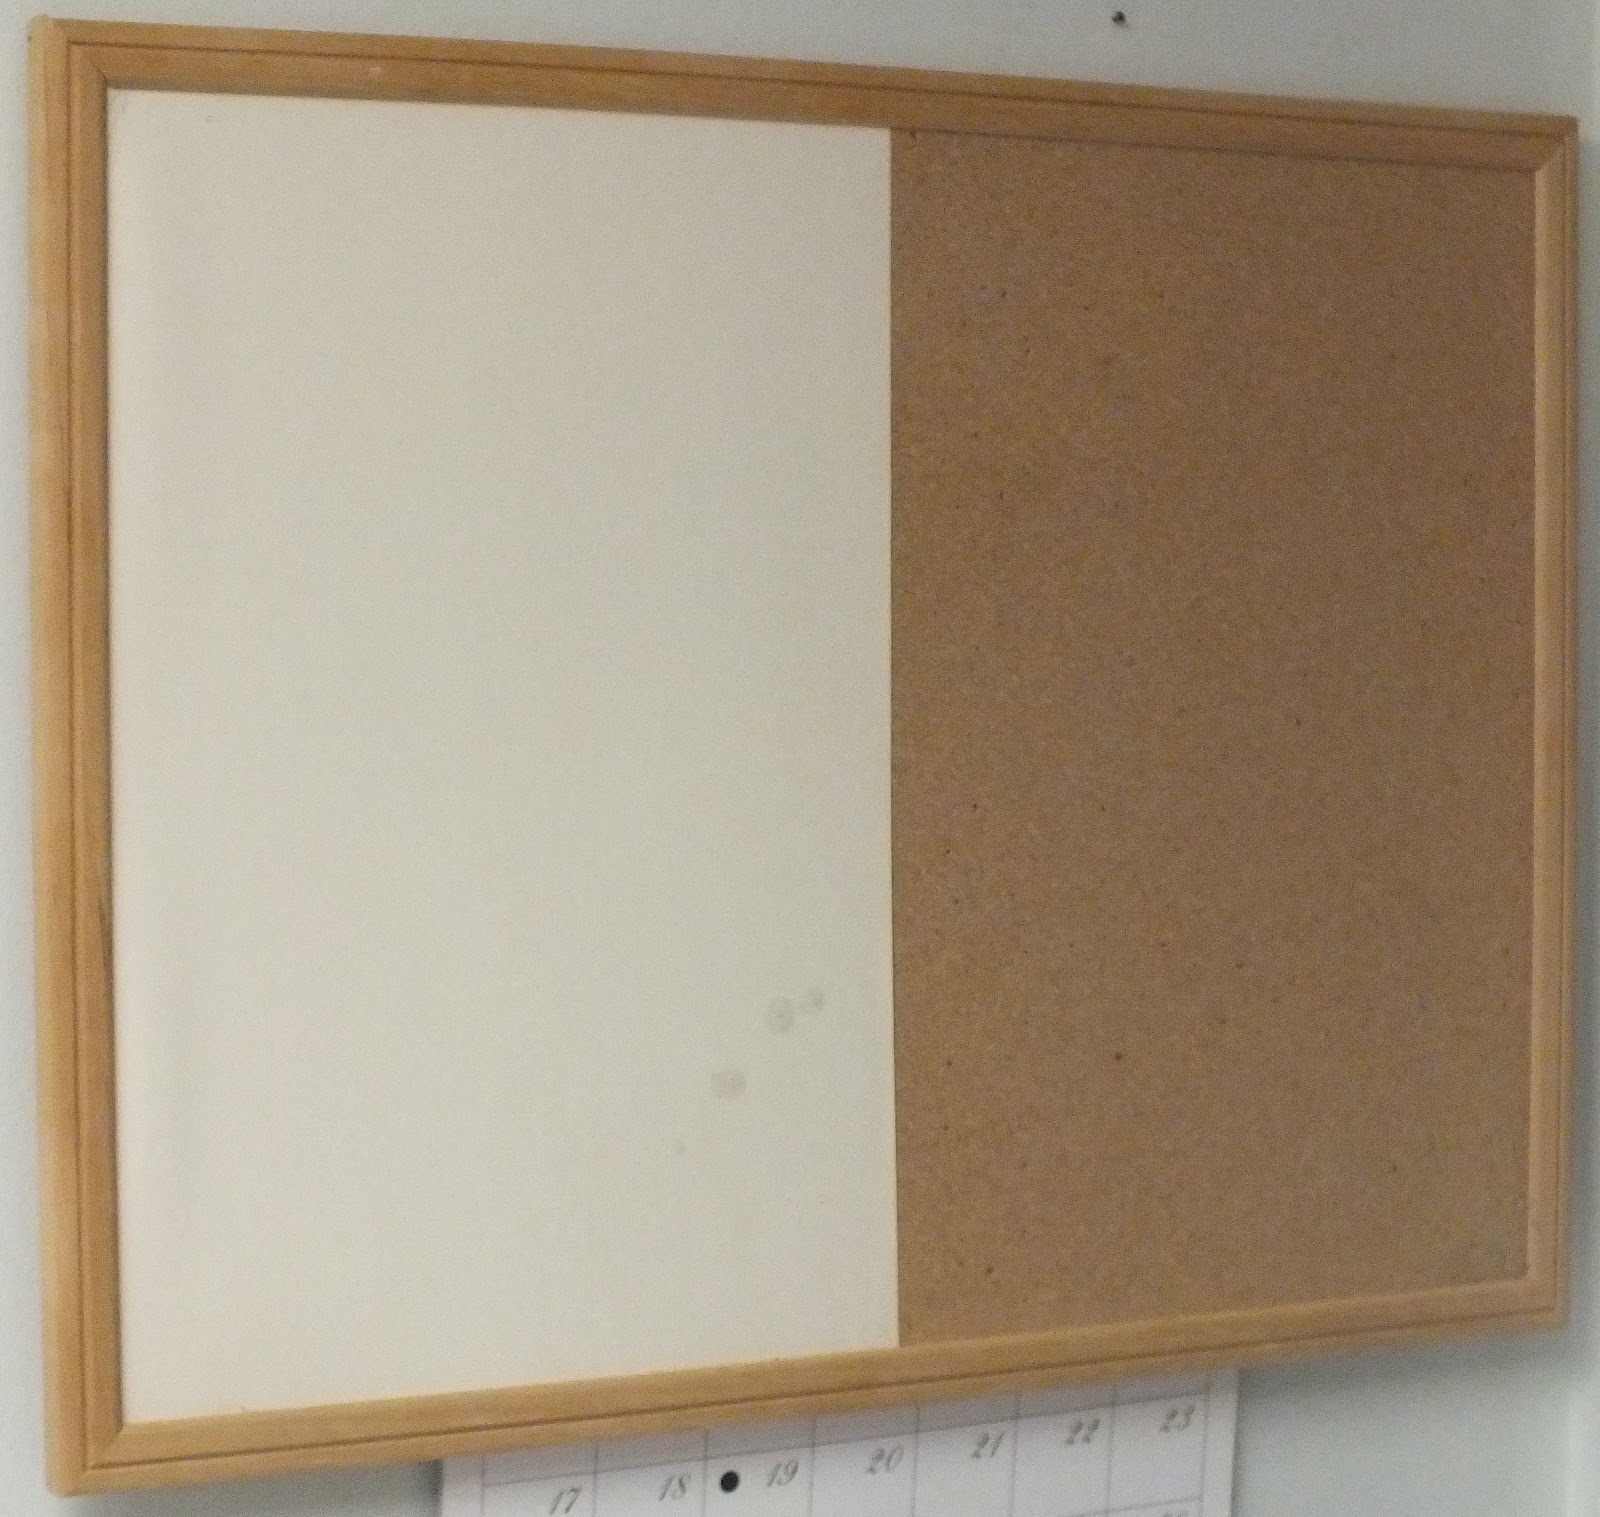
Here is what the board looked like when I began. I decided to use this particular board largely because, though we have several corkboards in the house, it was the first/only one we could find at the moment I decided I was making my menu board RIGHT NOW! LOL My poor hubby - he is so patient with me!


He even tried it on the wall to make sure it was going to fit vertically or horizontally so that I would be safe no matter where my creative juices led!

I had some leftover checkered paper and green paper I really wanted to use as they are my favourite colours, and chose a pink for the background. I also had some labels left over from the ones I made to label my kitchen cupboards so inked the edges of them in the same purple that I used on the labels, then stamped MENU on them. From there I was not really sure where to go and started playing around with multiple ideas.

I knew I wanted two pockets on it, and was originally toying with making them from envelopes but was afraid that would not be sturdy enough to last in my house. Finally I had a brilliant idea - I emptied the playing cards out of two boxes then cut the tops off to get the size I wanted. I then scored my cardstock and covered them, and added labels that matched my title.

At this point in time I got completely stuck and felt like I was going nowhere fast. I also discovered that our clothes pins are either missing or still packed, so now I had a good excuse to make a run to the dollar store. I am so glad I did! While there I found lots of embellishments in my favourite colours, and a perfect match for this board! I also found a jumbo-sized clothespin. I wasn't sure how that was going to mesh with my whole menu board but I knew I loved it and would find a way!

Back home the creative juices started to really flow! However, the background seemed a bit blah, and when Amanda offered a piece of purple paper instead we knew we had a winner! What a difference the brighter purple made! The clothespins got covered in the same green paper as the card boxes. I then wrote the days of the week on the little ones so that I would know where in my week I was at, then modpodged to make them hold up better to being handled.  I used wood glue to attach everything, largely because I couldn't find my hot glue gun. I have three or four of them and they have all grown legs and wandered off, probably with the scissors and nail clippers! What's with that anyway? I digress...

I glued everything on, added some pretties, and voila! A menu board! I especially love how the large clothes pin provides balance to the other side of the board, where I also have space for building my grocery list.

Here is a close-up of the menu side (and thanks to Tanner for the photos):

I chose to label my boxes "Planned Meals" and "Menu Ideas" as my shopping rarely lines up with the calendar. That way when I shop I can add all the meals I have ingredients for to the "Planned Meals" box and work from there when setting up my schedule for each week. If I end up moving things around, unused meals go back in that box again, and once we have eaten them, the card returns to the "Menu Ideas" box. For now I have also put in some blank cards and a pen as I didn't want to think through my whole menu in one shot

I am so excited to use my pretty board, and my kids are excited because Mummy managed to plan dinner before 6 at night two nights in a row!

Have a super week!

Sunday, April 1, 2012

Nicolas Creates

Today we finish up our look at what the kids made for Hobby Share Day.
Last, but not least, Nicolas chose to do electrical circuits. Originally they were going to do their names, but realized how slow and finicky it is (the wires are TINY) so instead they made the Big Dipper.
Here is what it looks like in the dark:
 And here is a view of the back, although you can't see most of the little wires as it is sealed up to keep them from being bumped:
That's a wrap for this year's Hobby Share. My kids were so blessed by the parents who took time to share a bit of themselves.

Monday, March 26, 2012

Creating Wherever We Go

My kids have been creating like crazy so I thought I would spend the next few days bragging on them!

These pictures are from our trip to my Mum's a couple weeks ago.
This first picture is one T took of an abandoned building up the hill at Hedley mine.

While at my mum's the kids were delighted at how much snow was still outside. They especially loved the big snow pile next to my mum's where the snowplow had been pushing the snow all winter.
 The kids built a fort in the snow bank with three rooms. Here is N posing in it. For those of you wondering - yes, he did have his snowpants with them and wore them playing outside. He had come in dripping wet so went back out without his snowsuit for pictures as the roof was starting to collapse in places and they wanted to get pictures while they still could. Below is another picture of one of their passages.

Creating Memories

My eldest son's birthday is coming up and that has me back into cake mode, thinking and planning his birthday cake. We used to do all ice cream cakes from Dairy Queen. Then one year I made one myself. The kids were so impressed, I have been making them ever since!
Overall, they are a delight to do. I really enjoy the challenge, and they love the memory of helping make it and of having it as a centrepiece.
Warning to those of you new to this: expect it to take a LOT of time, especially for your first few cakes. And some cakes are, by design, much more intricate and time-consuming. If you plan to make a theme cake, you need to plan accordingly!
This cake is the first homemade theme cake I ever made, and now I laugh at how simple it was. However, it was enough to impress my children, and it got me started on making homemade cakes. It is a space shuttle, in case you can't tell! I used liquorice strings to outline the shapes, and smarties to decorate it. Confetti sprinkles decorated the sky. The part that most impressed the kids was the sparkler boosters.

This cake is the first shaped cake I ever made. It is two crossed lightsabers for a Star Wars party, in case you can't tell. The kids were extremely impressed, I think mostly by the size of it. Each lightsaber is one 9 X 13 cake halved vertically, then lined up, making the lightsabers each over two feet long! I covered it all with white icing then used red and green liquorice strings to outline the different parts of each lightsaber, and gum drops for the buttons. I used spray-on food colouring to make the actual glowing part. Just be sure that you cover the parts around where you are spraying or you will find yourself scraping icing off and redoing parts of your cake! Can you tell that is experience is talking?

I have taken great pleasure in doing these for my kids and look forward to sharing more cakes with you in the coming weeks!

Wednesday, February 29, 2012

Creating an Organizer

I have decided to create a home organization binder this year as one way of getting myself more organized and in control of my daily life.
I have often tried to do all these tasks on the computer before, but find it is not practical. The computer is not portable, a pain to get out every time I need to check something, and increasingly it is occupied by children working on schoolwork or games!
I decided if I was going to have a binder I wanted it to be pretty. I was not finding what I wanted until I was at a crafting garage sale and found a great chipboard one. The binding on it was already covered in pretty pink fabric. Perfect!
The next job was to find some paper I liked to cover it with. Luckily I have a daughter who also crafts as none of my extensive collection co-ordinated with the binder. However, she had a book of paper that I just LOVE that all co-ordinates and she very generously shared with me.

I chose a patterned piece for the outside covers and a teal one for the inside. Incidentally, the teal and green were our wedding colours. How cool is that?

I decoupaged them in, then added two coats over the paper to try to seal it a bit better so it would hold up. The key to successful decoupage, as in so much of life, is PATIENCE! Use thin layers and let it dry completely before adding the next one.

Next I added ribbon to trim the edges. This part was a bit tricky as my ribbon was not as thick as I would have liked. For those of you who preplan supplies, choose a 1" ribbon, then you can just fold it around the edges and be done with it! I attached my ribbon with Sookwang sticky tape, making sure to fold it over the edges of the binder to protect the paper edges from catching and ripping off. I started where the paper joins the cloth and worked one piece of ribbon around the top, outside, and bottom edge of each half of the binder.

See how the bottom and outside edge have a nice narrow border?

Next I used ribbon on the inside to make a thicker border as the ribbon wasn't wide enough to cover the inside edge well.
I figured out the hard way that I should have done the outside edge top to bottom first, then cover it with a horizontal piece. Why? Because it is hard to fold in the ribbon on the second end to the exact spot you want it. By doing that order you only ever have to fold one end, because the final ribbon piece, the vertical one close to the binding of the book, wraps around the whole book and is just doubled over on top of itself so it doesn't have to line up to a nice spot. See?
On the first one I did below, the ribbons didn't match so nicely, and my pretty rose is to hide my messy corner where I ended up with sticky strip and no ribbon!
Finally I added some Stampin' Up Vintage Roses to the front and voila! I was done!
My pretty binder has me all excited about getting organized!

Sunday, February 26, 2012

Creating Memories

My daughter and I took advantage of the Groupons we found last fall and spent the afternoon at a paint your own ceramics place. I expected to be there about an hour, and I was dragging her out after THREE hours!

Painting was a lot of fun, but the best part was spending time with my daughter. She loves colour, she loves creative expression, and she loves spending time with her mummy! We had a wonderful afternoon together. She made a butterfly box for her dresser and a cereal bowl, and I decorated a container for the sponges and dishbrushes by my sink so I can get rid of my plastic one.

Pictures to come after we pick them up next week!

Sunday, February 19, 2012

Going on a Trip

We have a family reunion next month in Australia. I am so excited. I get to go!!!

Now for the not-so-exciting part: it is my flat self going, not the flesh and blood version.
When I heard about the reunion (which was planned in about 6 weeks; can you tell my sister helped?) I wanted to go, but of course that is not possible.

Then I got the brilliant idea of combining the reunion with my homeschool plans to study geography by making and mailing a flat stanley. So today I spent my afternoon making a Flat Elouise.

For those of you so inclined to make a similar project here is how I did it:
I cut a piece of newspaper the same size as my cardstock (I used letter sized cardstock), then folded it in half and cut out the outline of half a person. I opened and checked it and trimmed it until it looked about right.
Next I cut a newspaper section the size of half a shirt so I could make a top in two pieces so I would have a seam down the front.
I then traced the original piece onto different papers to make the skirt and shoes. After cutting them out, I attached the pieces from the bottom up -  shoes, then skirt, then top.
Next I found a picture of me and cropped my head. I then measured the size of my Flat El head and custom printed the photo to match.
After attaching the head, I used a 1" circle punch to cut pieces of circles, then layered them to create my curly hair. The above picture shows me with half my hair on.
After this I got to do the fun part - embellishing. I used ribbon to make a belt. Because it was a light coloured ribbon, I found the seam showed through, and so I doubled the ribbon over and used glue dots to attach it.
Then I used halfback pearls from my Stampin' Up pretties kit to make a necklace and for buttons down my skirt. I used the Stampin Up vintage roses to accent the waist and for a flower in my hair.


Now I am packed and ready for vacation! LOL


Why I Now Save My Cans

I made this beautiful garbage can for my daughter a while ago. She needed something for her room to collect the endless bits of garbage she seems to make in a day. I had made smaller ones a few years ago for a birthday party, but now I am grabbing the true potential of containers.


To make this garbage can was so easy:
Open your cans with one of those can openers that removes the whole lid without leaving sharp edges. Clean and dry your can thoroughly before decorating your container.
Choose your paper and measure it to the right height, and cut it. I found it best to measure the height to the inside of the metal rim. Because my container was so big (this is the 2.84L Costco diced tomato tin) I needed two pieces of paper. I chose to repeat the same pattern but you could use complementary papers. My papers came embossed with these sayings. You can cut out or stamp words to add if you want something on there that's personalized, like a name.
I hot glue gunned the papers on the can, then covered all my edges with ribbon. I then embellished with a few punched out hearts and a couple flowers and I was done. 15 minutes for a gorgeous garbage can!
I have more can ideas in my head so hopefully they will be published soon, as long as I can keep my recycling-happy family from removing all my cans! LOL

Tuesday, February 14, 2012

Valentine's Day

We had a Valentine's party at our house yesterday so wanted to make it look pretty both for yesterday and today.
Sunday night the boys and I cut out a bunch of hearts from construction paper. We used red, white, pink, and purple paper. We folded them in fourth and cut a half heart shape so that it opened out to make 2 hearts from one piece of paper. Then we used the corners to make more little hearts. From one piece of 9 X 12 paper we got two large hears and four little ones.
The large hearts were taped on the mantle and mirror with edges overlapping to make a nice fake garland.
Isn't that pretty?

We punched holes in the tops and bottoms of the little hearts and strung ribbon through them to make vertical garlands, which we hung over the tables and in front of the windows. With narrow ribbon you would need to loop a knot at the top of each heart to anchor it in place, but ours was big enough that the hearts just hung in place on their own.
How easy it is to make things pretty and festive!
Happy Valentine's Day everyone!!!

Sunday, January 8, 2012

Create - A Word for 2012

Much as I longed to spend another year seeking simplicity in my life, I felt God calling me a new way - to seek to create.
I love creating and have a passion for it, but it is not something I have ever really had time or energy for. When I first felt pulled towards this word, I saw it in a very narrow focus - creating crafts, which I love to do and hope to do a lot of! However, I am feeling God spreading His arms, and showing me different ways to create this year:
-  crafts for fun
- crafts for business - something I have longed to do but never had time for
- creating a home out of our new house
- creating a more nurturing environment in our home
- creating a blog
- creating a book (I have felt a longing to write for years, and my kids are really pushing me on this one)
- creating better ways of managing our lives and our school

I am looking forward to this year, and to seeing how God seeks to push me beyond my boundaries, out into new territory to explore and learn from.

Saturday, December 31, 2011

Intro

Hi all!

Welcome to my new blog! I have felt the urge to create building for a while, and my goal for 2012 is to find different ways to create in my life. I love writing, and have long wanted to do a blog, so thought that starting here would be a good way to accomplish one goal while having a place to record my other successes!

Thanks for stopping by!